Jobs
Jobs within a Skyve application allow long running tasks (jobs) to be scheduled to run in the background. Jobs can be scheduled to be run once, or a schedule can be saved if they need to run repeatedly over time, e.g. a nightly backup job.
Prerequisites: Your user has the JobMaintainer role in the admin module.
Scheduling a recurring job
-
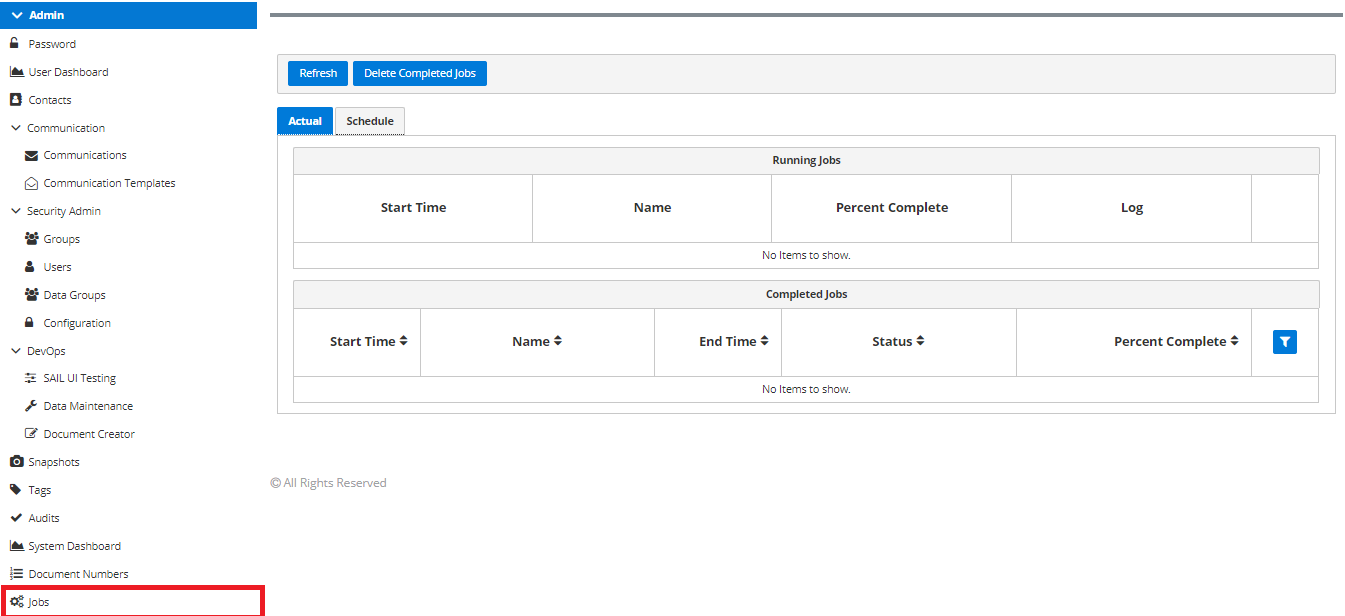
Under the ‘Admin’ module, click into ‘Jobs’
-
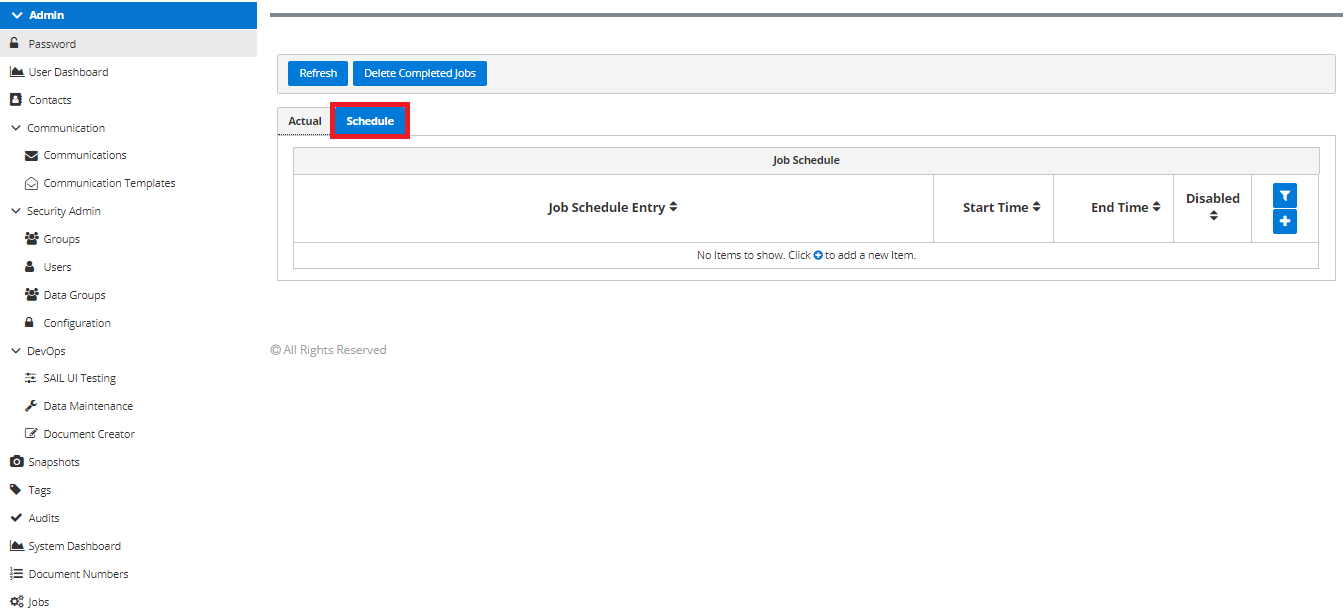
Navigate into the ‘Schedule’ tab
-
Click ‘+’ to add a new job
-
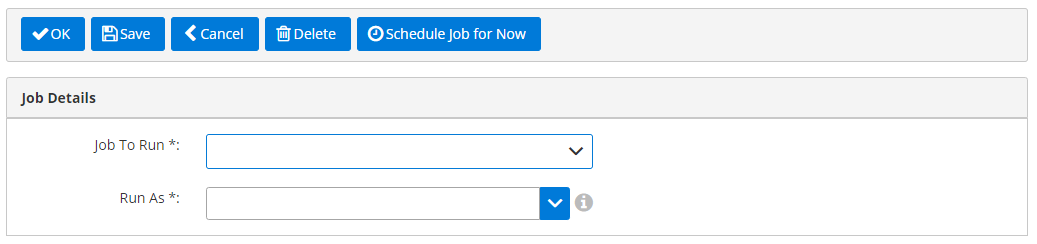
Select the job to be run from the ‘Job To Run’ drop-down, and select the user to run it as in the ‘Run As’ lookup (required)
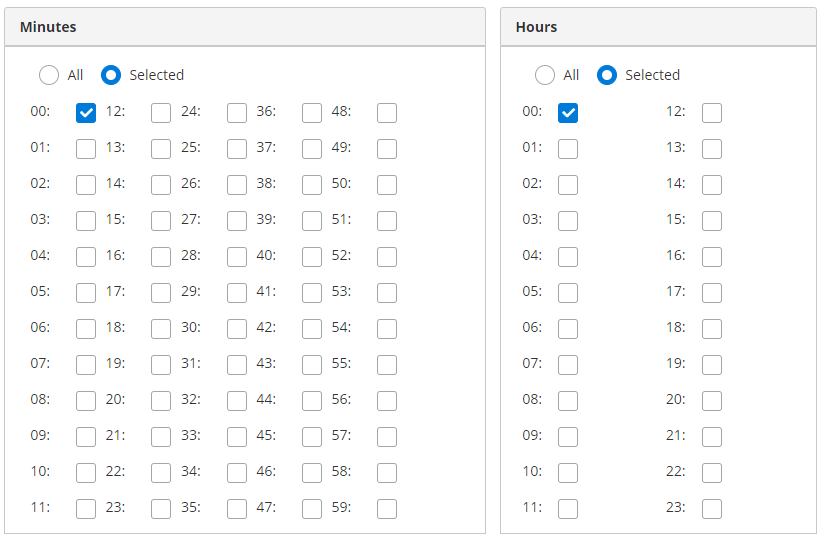
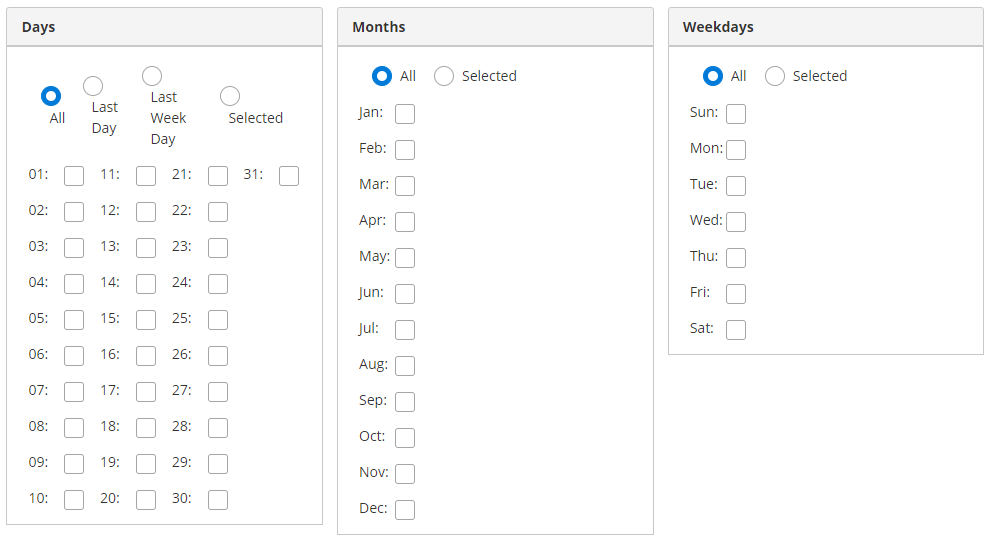
- Enter the time you want the job to run, as well as the days/dates it should run
- If the job should run always, select the ‘All’ buttons to indicate that the job should run during every time or date period
- If the job should run at chosen times/dates, select the ‘Selected’ button and click the times/dates that the job should run
- For ‘Days’, two additional options are available: ‘Last Day’ (the last day of each month) and ‘Last Week Day’ (the last weekday of each month)
- A combination of these ‘All’ and ‘Selected’ times and dates can be utilised to gain the required job times
-
(optional). A date range for the job to run can be applied in the ‘Date Range To Execute’ section at the bottom of the page — both dates may be left blank to run indefinitely

- Click ‘OK’ to save and return
Once saved, the schedule list shows a plain-English ‘Schedule’ column describing when each job will run — a quick way to sanity-check your configuration.
To temporarily suspend a recurring job without deleting its schedule, zoom into the schedule, tick ‘Disabled’ and click ‘OK’. Untick it to resume.
Note: in a clustered environment, only the instance designated as the job scheduler can maintain schedules — on other instances the Schedule tab is read-only. If you cannot save a schedule, contact your system administrator.
Scheduling a one-off job
-
Under the ‘Admin’ module, click into ‘Jobs’
-
Navigate into the ‘Schedule’ tab
-
Click ‘+’ to add a new job
-
Select the job to be run from the ‘Job To Run’ drop-down
-
Click ‘Schedule Job for Now’. The job runs immediately as the currently logged-in user (the ‘Run As’ setting is not used for immediate runs)
-
Click ‘Cancel’ to return — a one-off run is not saved as a schedule. The job’s progress and results can be checked under ‘Running Jobs’ and ‘Completed Jobs’ on the ‘Actual’ tab
Monitoring jobs
The ‘Actual’ tab of the Jobs view shows what is running now and what has run:
- Running Jobs — jobs currently executing, with their start time and percent complete
- Completed Jobs — finished jobs, with their start and end time and final status
The view refreshes itself automatically every 30 seconds; a ‘Refresh’ action is also provided. The ‘Delete Completed Jobs’ action clears the entire completed jobs history after confirmation — use with care if you rely on the history for auditing.
Checking a job’s results
Zoom into a job from either list to see its details and full execution log — this is where to look when a job (such as a communication send or an import) reports errors. From here:
- Cancel Job stops a running job that supports cancellation
- Re-run Job runs a completed job again with the same inputs