Tags
Another powerful feature of List Grids in the desktop mode of Skyve applications is Tags. Tags allow you to store a selection of records within a Skyve list, or across multiple lists, and act on that selection later — including filtering a list to just the tagged records and performing bulk actions.
Tags are private to the user that created them — other users cannot see your tags, but you can copy a tag to another user.
Desktop mode required: Tags are only available in desktop mode, including the Admin -> Tags menu item used later on this page. To switch modes, click your username in the top right hand corner and choose Switch Mode — see Switching Interfaces.

Creating a Tag
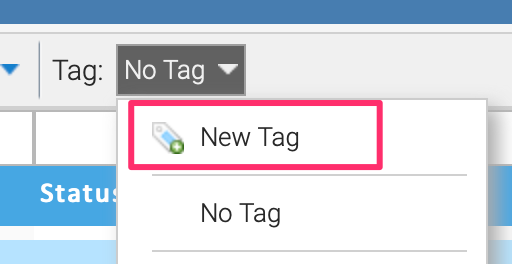
- To create a new tag, from the list toolbar, click the Tag control
- Select
New Tag - Enter a name for your tag and click
OK - The
Tagmenu will update to show that you have your new tag selected
Adding records to a Tag
Tags are a re-usable filter that can be used to remember a selection of records. For example, if you have a list of Orders that you need to process, you can use a tag to indicate which records are still to do, and untag them once complete.
To add a single record to the set of records as part of a tag:
- Navigate to a list grid with a saved tag
- From the
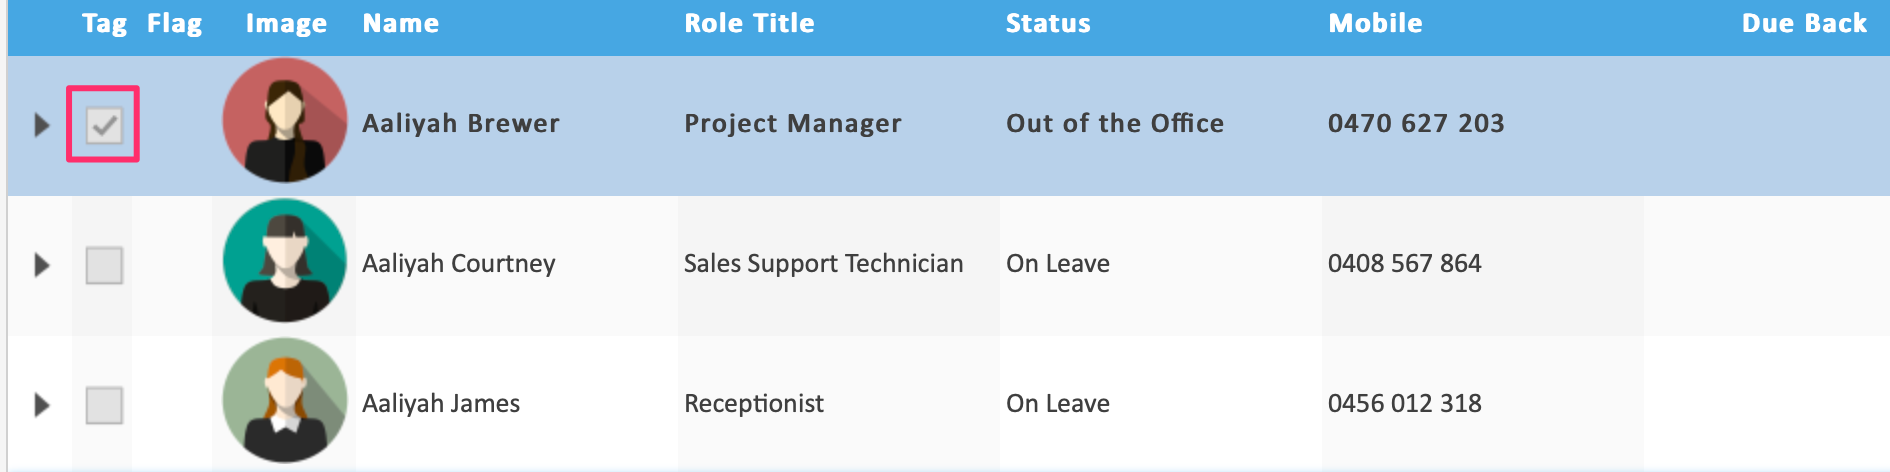
Tagmenu, click the name of the tag you wish to use - Click the checkbox in the tag column to apply the tag to individual records
To add all records to the set of records as part of a tag:
- Navigate to a list grid with a saved tag
- From the
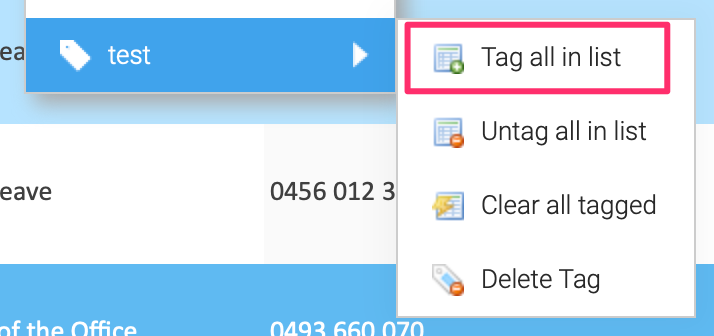
Tagmenu, click the name of the tag you wish to use to select it - From the
Tagmenu again, hover over the name of the selected tag and selectTag all in list - The list will update to show that all records have been tagged
Removing records from a Tag
To remove a single record from the set of records as part of a tag:
- Navigate to a list grid with a saved tag
- From the
Tagmenu, click the name of the tag you wish to use - Click the checkbox in the tag column for a tagged record to remove the check to remove the tag from individual records
To remove the tag from all records associated with a tag in a particular list:
- Navigate to a list grid with a saved tag
- From the
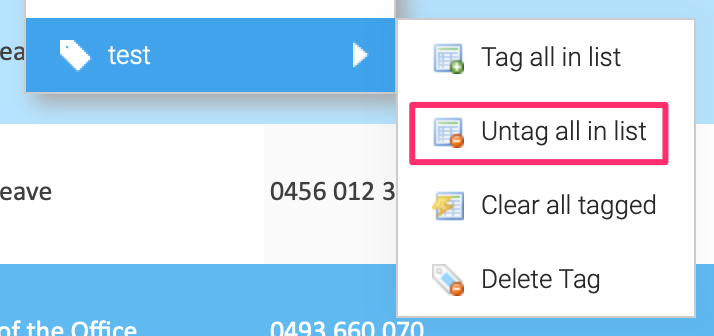
Tagmenu, click the name of the tag you wish to use to select it - From the
Tagmenu again, hover over the name of the selected tag and selectUntag all in list - The list will update to show that all records have been untagged
Loading/Restoring a Tag
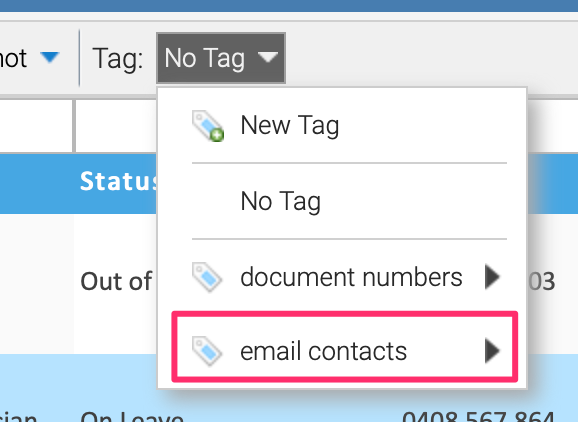
After you have created a tag, you can load it when returning to the same list with your saved tag(s).
To restore a saved tag:
- Navigate to a list grid with a saved tag
- From the
Tagmenu, click the name of the tag you wish to restore - Skyve will update the list grid with the tagged records in the list
Updating a Tag
To make changes to which records are selected for an existing tag:
- Navigate to a list grid with a saved tag
- From the
Tagmenu, click the name of the tag you wish to update to select it first - The
Tagmenu will update to show that you have your new tag selected - Make the changes to your selected tag using the Tag column for single records or the tag menu to select/deselect all
- Tag selection changes are saved immediately, no further action is required
The Tag menu also provides two further items:
- No Tag — deselects the current tag, hiding the tag column again without changing which records are tagged.
- Clear all tagged — removes every record from the tag, across all lists, not just the records in the current list. Use
Untag all in listif you only want to untag the records shown in the current list.
Filtering a list by Tag
Selecting a tag does not filter the list — it shows the tag column so you can see and change which records are tagged. To reduce the list to only the tagged (or only the untagged) records, use the advanced filter: add a criterion on the Tag field with the value true (tagged) or false (untagged).
Deleting a Tag
To delete an existing tag you no longer want to keep:
- Navigate to a list grid with a saved tag
- From the
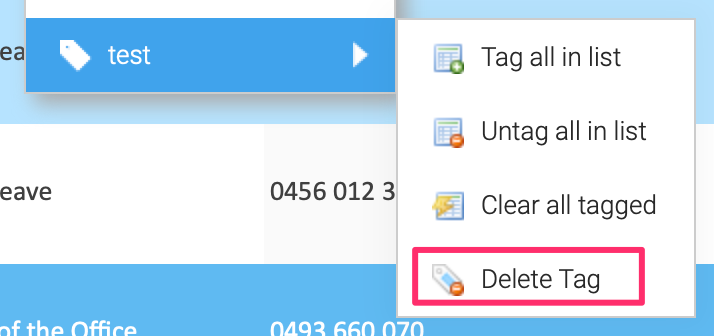
Tagmenu, hover over the name of the selected tag and selectDelete Tag - Select
Yesto confirm deletion of the tag
Tagging records from a file
The Load tab of a Tag lets you tag (or untag) records in bulk by uploading a spreadsheet or CSV file of matching values — for example, a list of customer numbers extracted from another system.
- Navigate to Admin -> Tags and zoom into the tag
- Select the
Loadtab - In the
Loadsection, select theModuleandDocumentwhose records you wish to tag. From here you can also useTag Allto tag every record of that document, orClear Tagto untag everything - In the
Matchsection, select theAttributeof the document to match your file values against, theFilter Operator(equals or like), and theColumn (first column is 1)your values appear in within the file - If your file’s first row is a heading row, tick
Upload File has Column Headers - Click
Upload Tag Criteriaand choose your file - Once processed, the result counts show how many rows were uploaded, how many matched, and how many records are now tagged
Combining Tags
The Combinations tab lets you combine two tags using set operations — useful for questions like “tagged in last month’s campaign but not this month’s”.
- Navigate to Admin -> Tags and zoom into the tag you wish to modify
- Select the
Combinationstab - Select the other tag to combine with, and the
Operator:- Union — add the other tag’s records to this tag
- Except — remove the other tag’s records from this tag
- Intersect — keep only records that are in both tags
- Click
Explainto preview a description of what the combination will do - Click
Perform Combinationto apply it to this tag
Sharing a Tag
Tags are private to the user that created them, but a tag can be copied to another user:
- Navigate to Admin -> Tags and zoom into the tag
- In the
Copysection, select the recipient inCopy to user - Click
Make Copy
The copy is owned by the recipient and appears in their Tag menu — subsequent changes to your tag are not reflected in their copy.
Performing bulk actions against a tag
One of the most powerful features of tags is the ability to perform bulk actions on all tagged items. This allows you to execute server-side actions or default operations across all records associated with a tag.
To perform a bulk action against a tag:
- Navigate to Admin -> Tags
- Select a tag from the list of tags that you wish to perform an action on
- Navigate to the
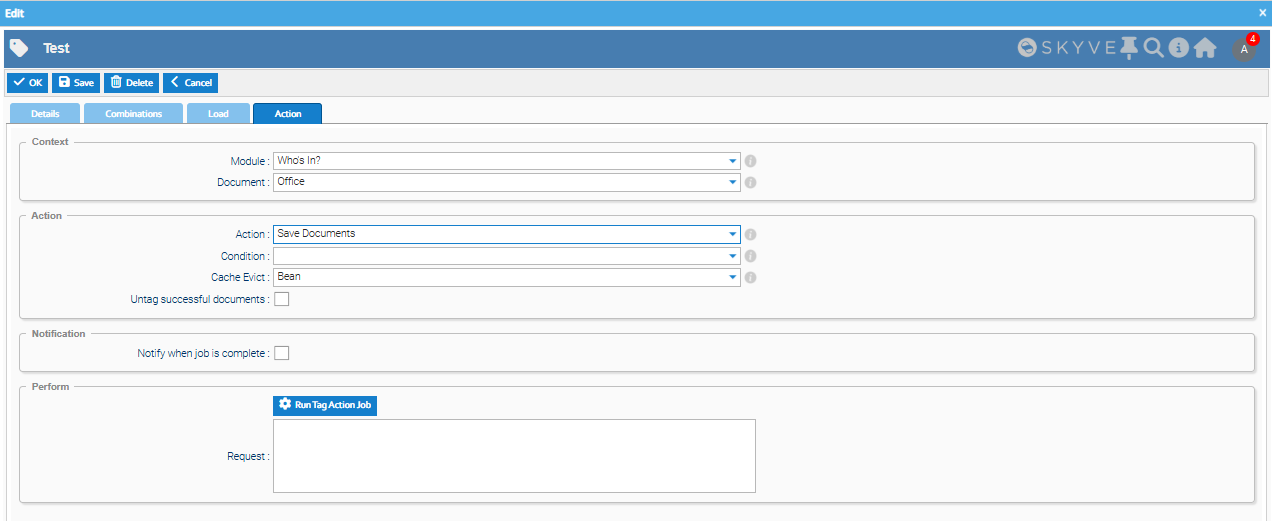
Actiontab. - Configure the action settings:
- Module: Select the module containing the document and action
- Document: Choose the document type for the tagged items
- Action: Select the action to perform on each tagged item
- Condition: Optionally specify a condition that an item must meet for the action to be performed on it
- Cache Evict: Choose cache eviction strategy (None, Bean, or All)
- Untag successful documents: Check to automatically untag successfully processed items
- Notify when job is complete: Check to receive an email notification when finished
- Click
Run Tag Action Jobto start processing - The job will execute the specified action on each tagged item that meets the condition
Available default actions include:
- Delete Documents - Untags and permanently deletes the item
- Save Documents - Saves the item to the database
- Upsert (Save Top Level Only) Documents - Updates or inserts only the top-level item using upsert operation
- Validate Documents - Validates the item
You can also select custom document actions that have been defined for the specific document type.
The bulk action runs as a background job, allowing you to continue working while it processes the tagged items. Progress is tracked and logged, with detailed results available in the job execution log.
Tags are also used to select the recipients of a Communication.