Snapshots
Another powerful feature of List Grids in the desktop mode of Skyve applications is Snapshots. Snapshots allow you to save customisations to a list grid — advanced filters, sorting, column selection and widths, grouping, and the summary line selection.
A snapshot belongs to the list it was created on — it appears in the Snapshot menu of that list only.
Desktop mode required: Snapshots are only available in desktop mode, including the admin -> Snapshots menu item used later on this page. To switch modes, click your username in the top right hand corner and choose Switch Mode — see Switching Interfaces.

Creating a Snapshot
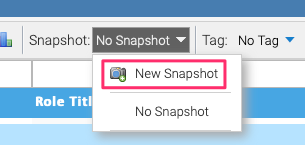
- To create a snapshot, perform some customisations to a list grid, such as applying a custom filter.
- From the
Snapshotmenu, selectNew Snapshot - Enter a name for your snapshot and click
OK - Your
Snapshotmenu will update to show that you have your new snapshot selected
Loading/Restoring a Snapshot
After you have created a snapshot, you can load it when returning to the same list with your saved snapshot(s). To restore a saved snapshot:
- Navigate to a list grid with a saved snapshot
- From the Snapshot menu, click the name of the snapshot you wish to restore
- Skyve will update the list grid with the settings in your saved snapshot
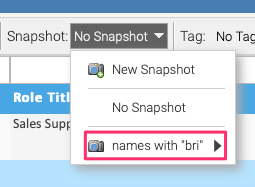
To return the list to its default configuration, select No Snapshot from the Snapshot menu.
Updating a Snapshot
To make changes to an existing snapshot:
- Navigate to a list grid with a saved snapshot
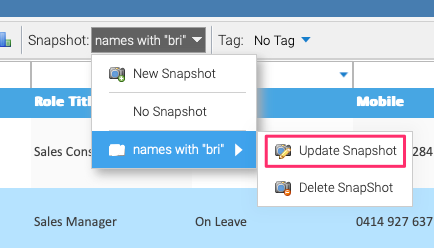
- From the
Snapshotmenu, click the name of the snapshot you wish to update to select it first - Make the changes to your selected snapshot that you wish to apply and save
- From the
Snapshotmenu again, hover over the name of the selected snapshot and selectUpdate Snapshot - Your snapshot will be updated to reflect the current list grid configuration
Note: the Update Snapshot menu item is disabled (shown as “Update Snapshot (Select the Snapshot first)”) until the snapshot is the currently selected one.
Deleting a Snapshot
To delete an existing snapshot you no longer want to keep:
- Navigate to a list grid with a saved snapshot
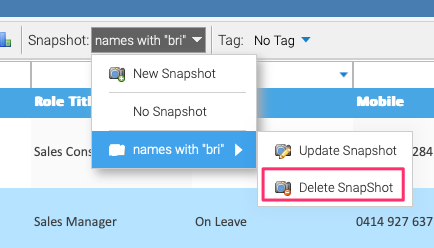
- From the
Snapshotmenu, hover over the name of the selected snapshot and selectDelete Snapshot - Select
Yesto confirm deletion of the snapshot
Sharing a Snapshot
Snapshots are private to the user that created them, but if you have a useful snapshot you would like to share to others in your team, they can be copied. Note, if the recipient makes changes to the snapshot, it will not be reflected in your snapshot.
- Login to the application with a user with the
Basic Userrole - Navigate to
admin -> Snapshots - Double click or zoom into the snapshot you wish to share with another user
- Select a user from the
Copy to userpicker - In desktop mode, you can also enter a name for the copied snapshot (in the default responsive interface, the copy keeps the original name)
- Click
Make Copy
The copy is owned by the recipient — it appears in their Snapshot menu on the same list.
Reordering Snapshots
If you have several snapshots on one list, you can control the order they appear in the Snapshot menu:
- Navigate to
admin -> Snapshots - Select the
Reorder Snapshotstab - Select the module and list your snapshots belong to
- Drag and drop the snapshots into the desired order
- Click
Reorderto save the new order