Enabling OAuth Authentication
In addition to local authentication, Skyve supports authentication using OAuth2 with Google, Facebook, GitHub and Office 365.
Enabling OAuth2 authentication only allows a user to authenticate with Skyve, it does not define which roles/groups the user is authorized for within the application. This is still maintained by Skyve.
Once enabled, the login screen will update and provide a new button for users to login with. Services can be enabled by turning on the specific properties in the account section of the application’s json configuration file.
Microsoft Entra ID integration
If you are using Microsoft 365, it is possible to integrate your Skyve application with Entra ID. This provides users the ability to login using their existing business email and password (and 2-factor authentication if enabled) to login, instead of having Skyve manage the credentials.
Prerequisites:
- You have an active Microsoft 365 subscription
- Usernames in your Skyve application must match the email address in your active directory
- Your Skyve application is at least version 8.2.2
Configuration
Microsoft Azure Portal
- Login to portal.azure.com
- Click the hamburger menu in the top left hand corner, then select Microsoft Entra ID

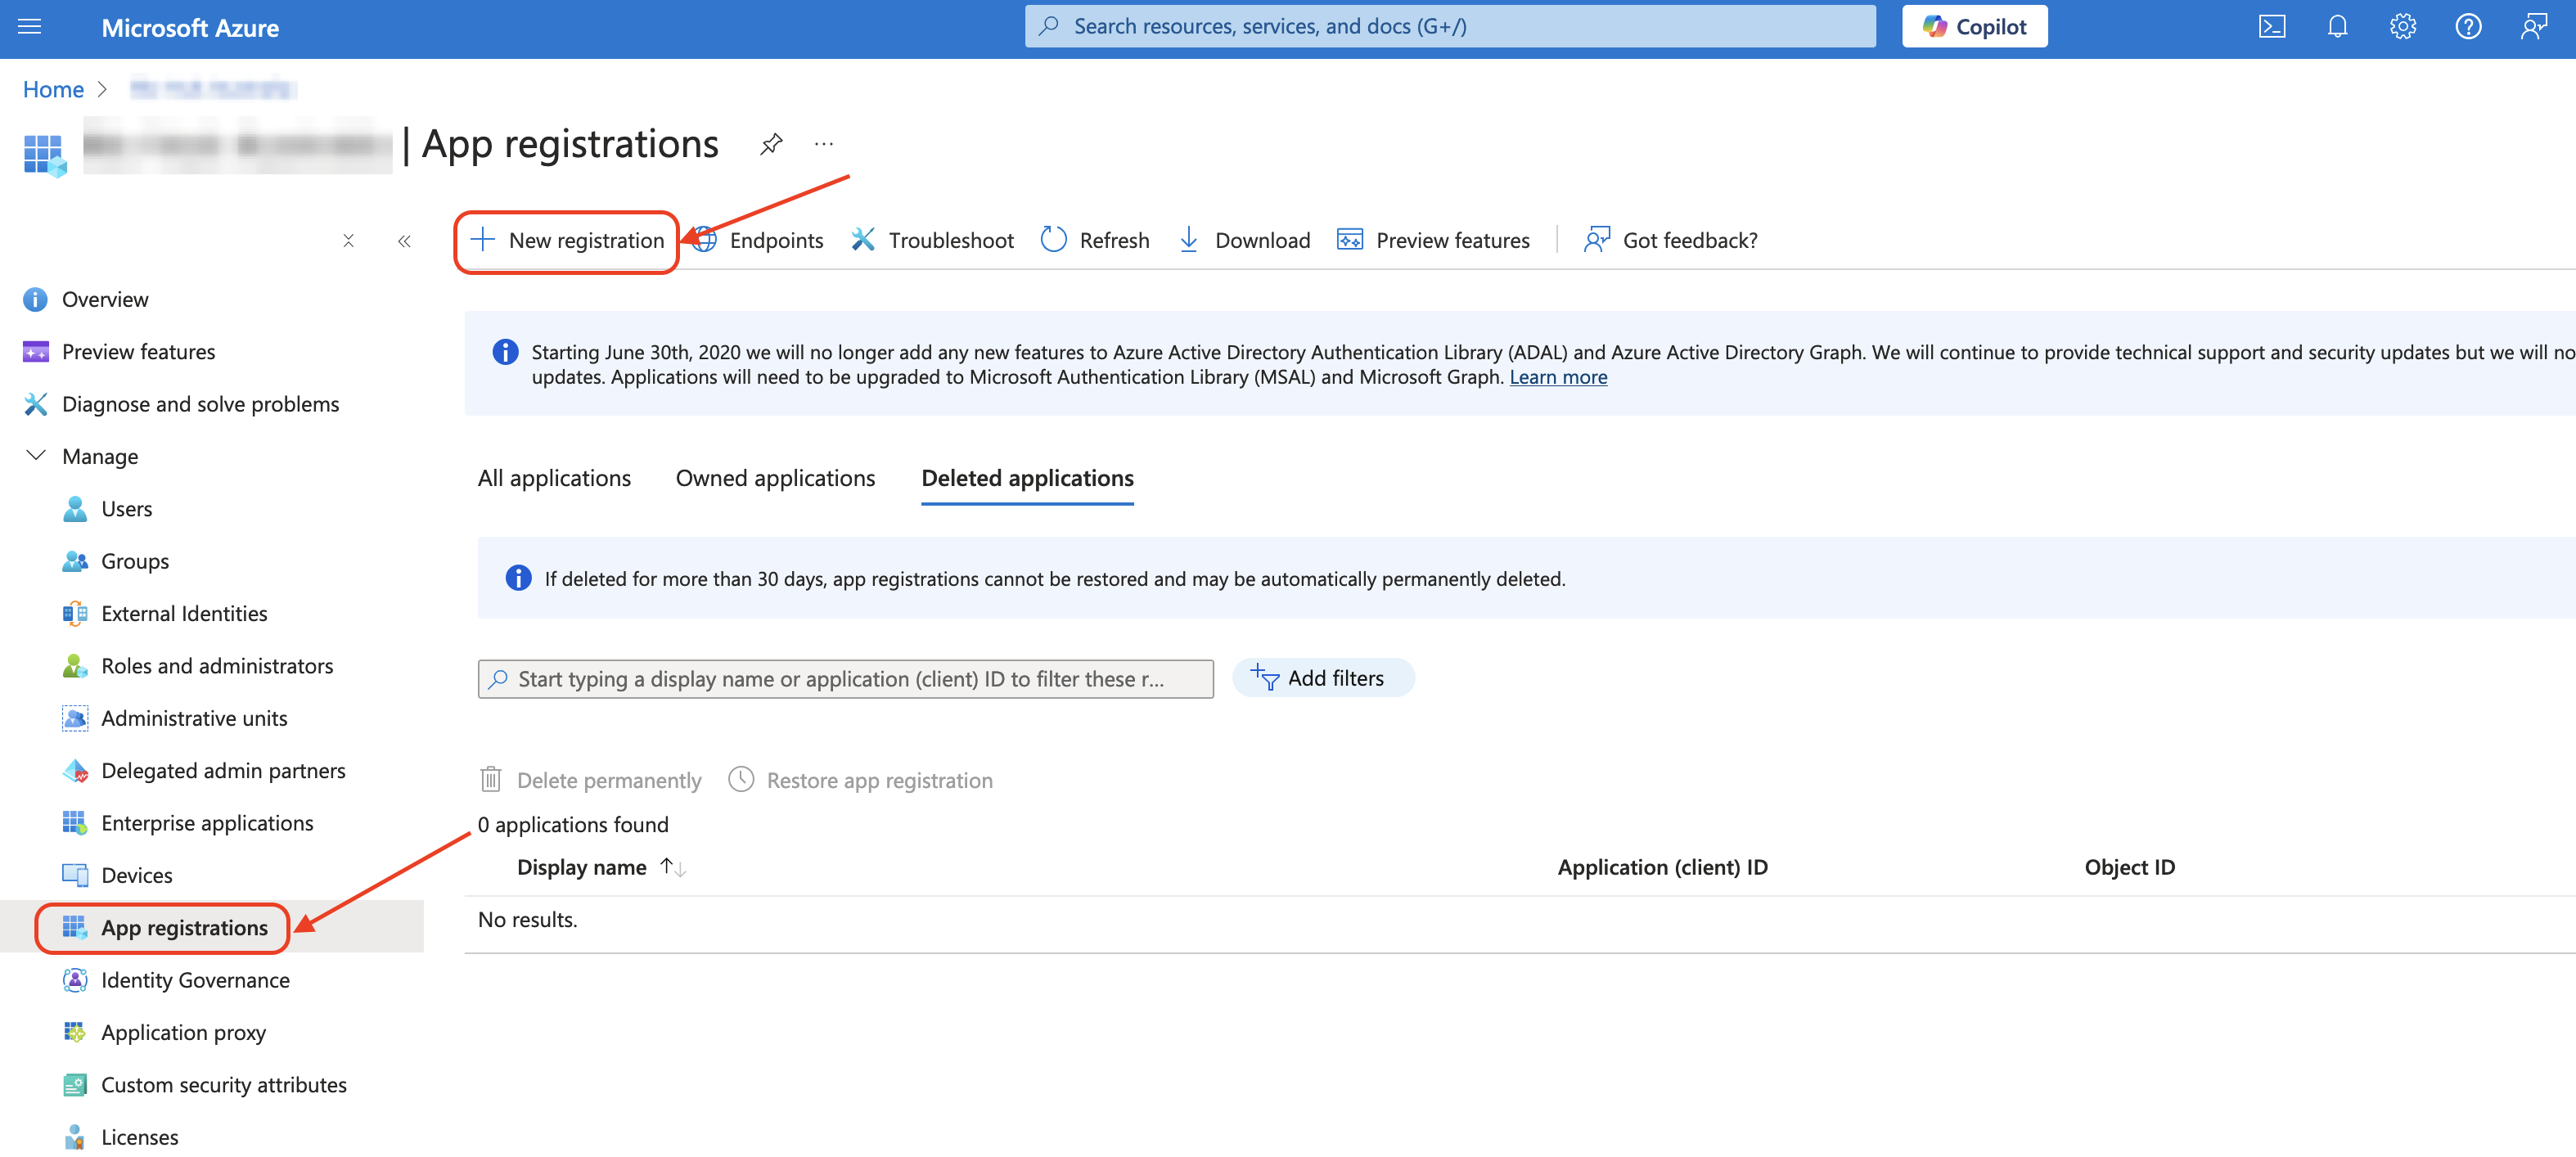
- Select
App registrations - Click
New registration

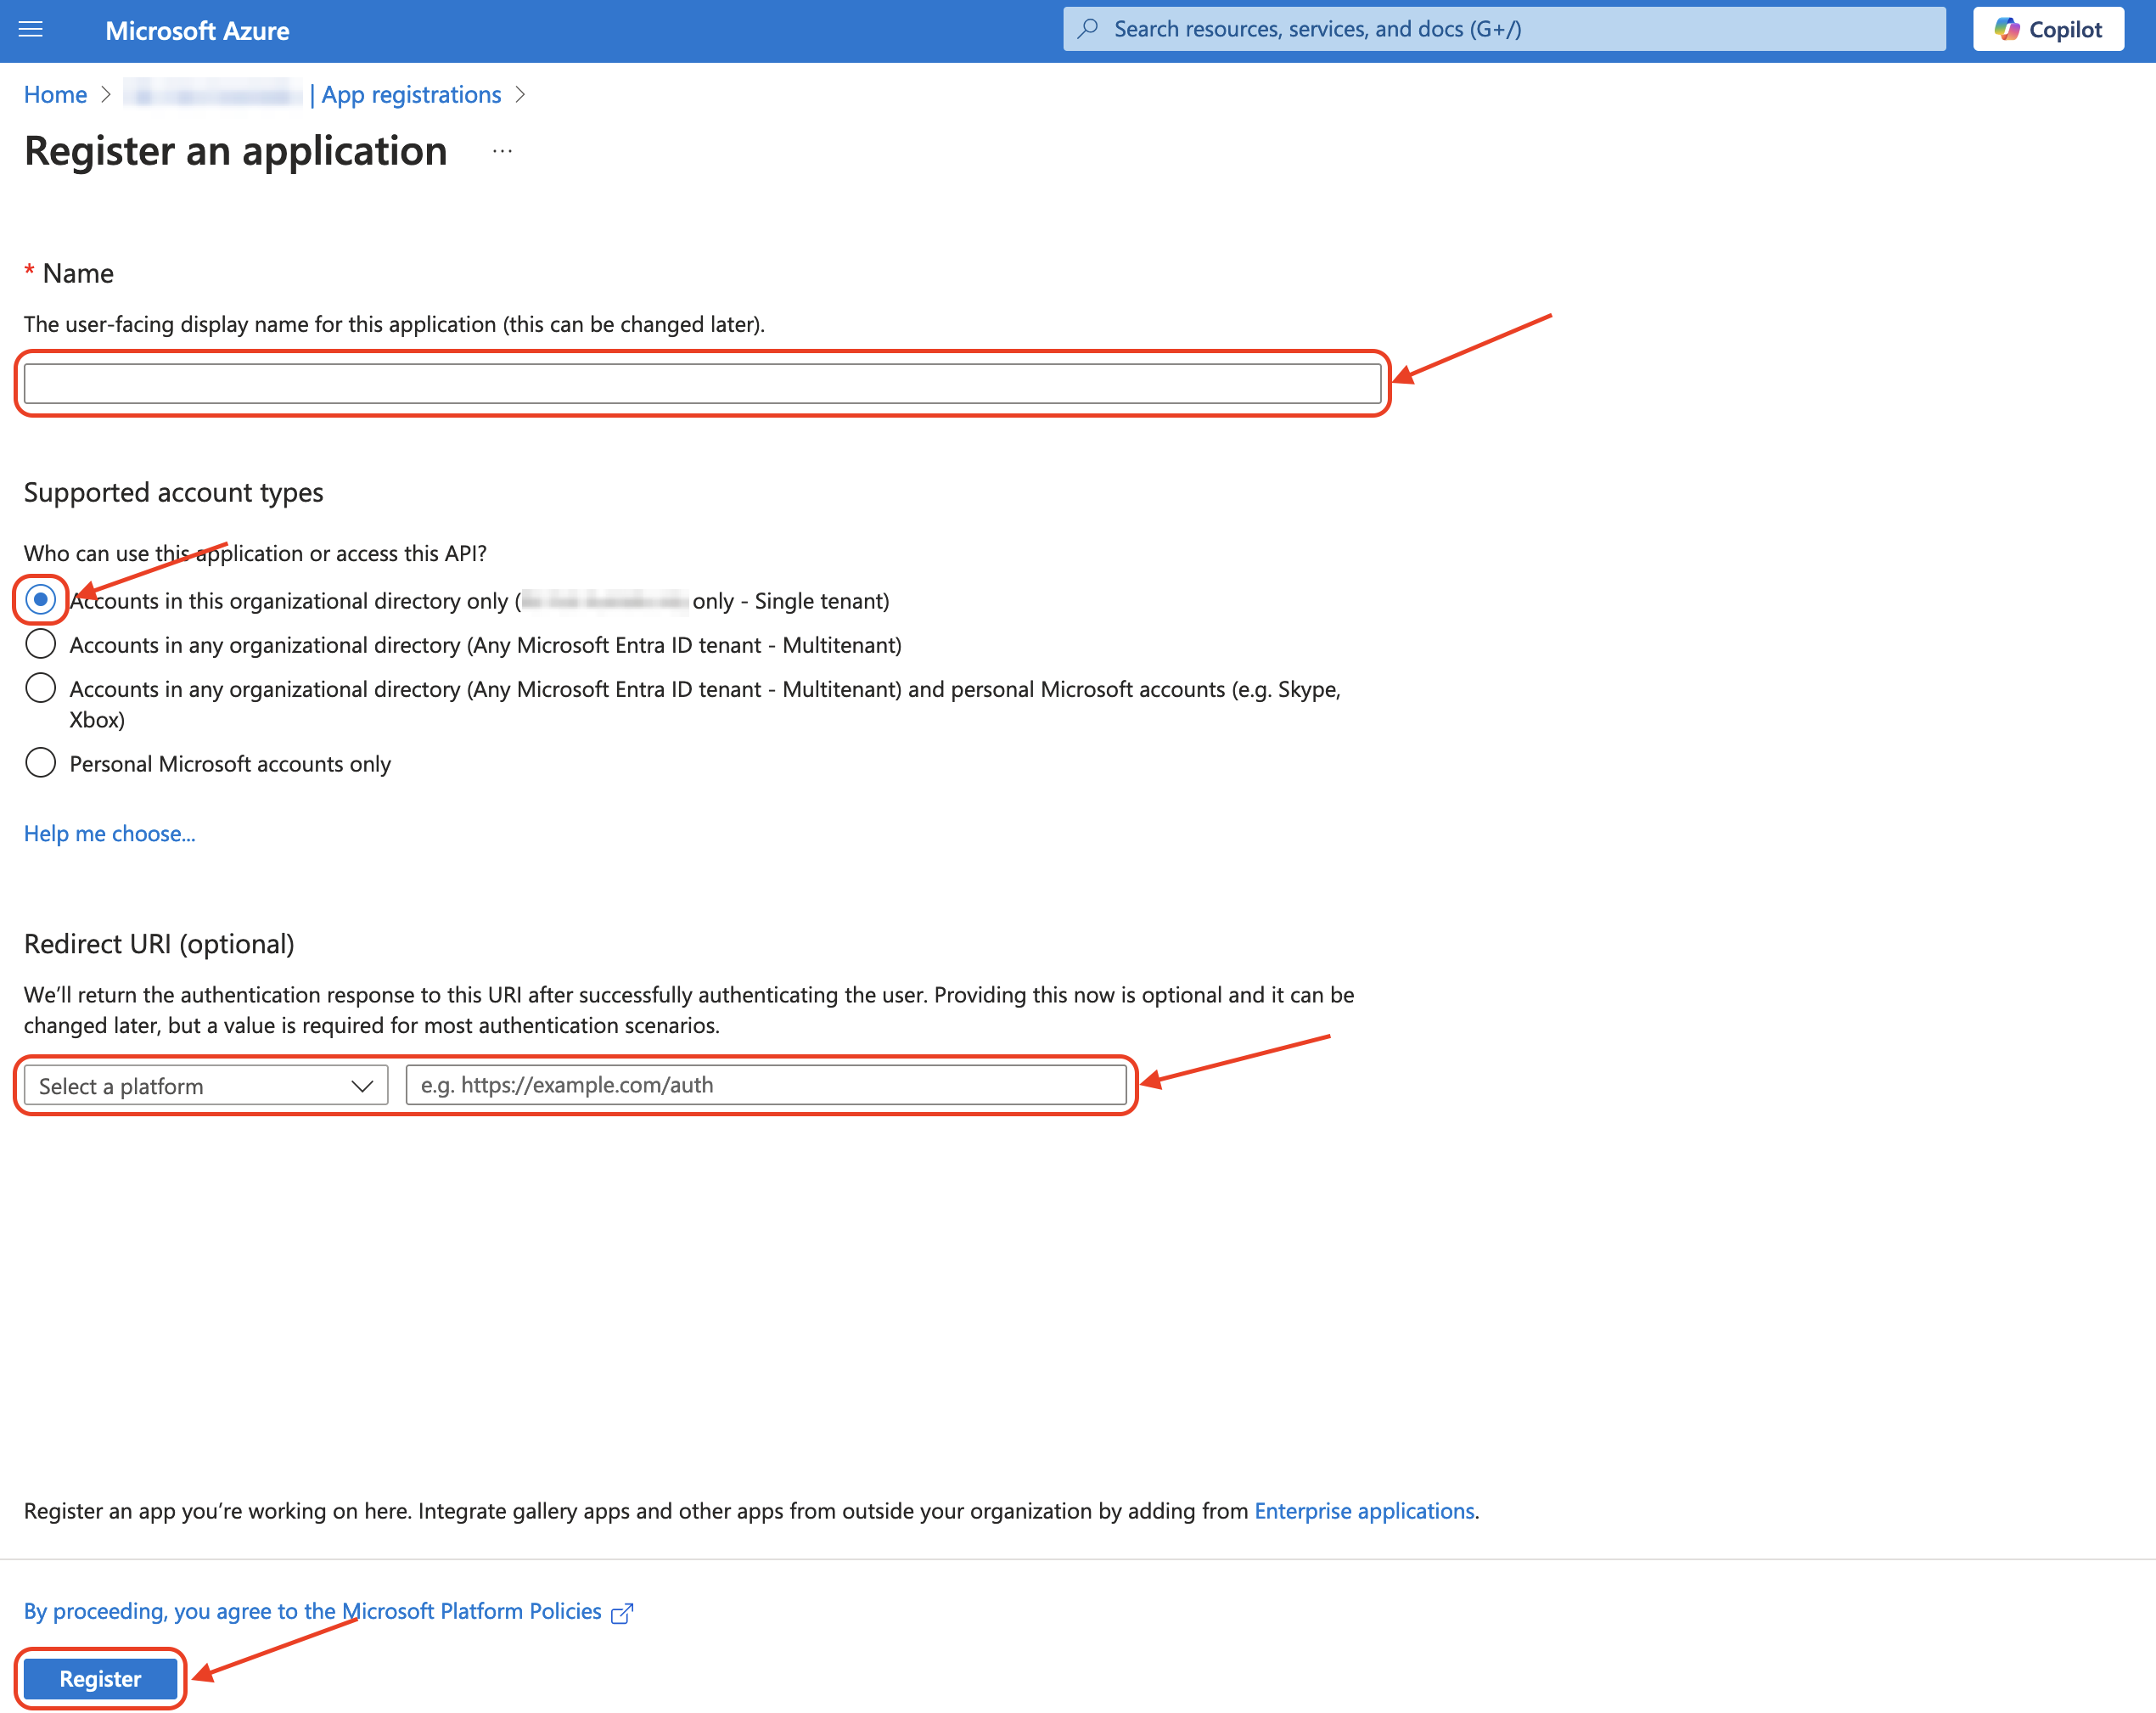
- Enter the name of the application
- Keep Single Tenant selected for supported account types
- Select Web and enter the url, the url should be the context path to the application and end with
oauth2/code/microsoft, be sure to EXCLUDE the trailing slash- The Redirect URL should be the following with the application URL:
<protocol>://<domain>:<port>/<applicationName>/login/oauth2/code/microsoft
- The Redirect URL should be the following with the application URL:
- Ensure you have the correct
protocol(http/http),domain name, optionalportandapplication name - E.g.
http://localhost:8080/mySkyveApp/login/oauth2/code/microsoft - Click
Register

- Add the following properties from the app registration you entered in the Azure portal to your application’s json configuration:
"account": {
  "azureAdAuthTenantId": "<your-tenant-ID>",
  "azureAdAuthClientId": "<your-client-ID",
  "azureAdAuthSecret": "<your-client-secret>"
}
To generate a client secret if you do not have one, from the Overview -> Client credentials, click the link, or select Certificates & secrets from the left-hand menu. Follow the prompts to create a new client secret and copy the value once generated. (NOTE: Be sure to copy the value at this point in time as it will not be available later and a new Secret will need to be generated.)


The clientID and tenantID can be taken from the App Registrations also, as shown.

Skyve Customisations
In order for the JSESSIONID to not be lost when redirecting through the Microsoft authorisation flow, the cookie settings need to be customised for the application when enabling Entra ID in Skyve.
This requires a file to be created in your project:
- Create file
undertow-handlers.confatsrc/main/java/webapp/WEB-INF/undertow-handlers.confwith the following values:
path-prefix('/')->samesite-cookie(mode=Lax, cookie-pattern=customer)
path-prefix('/')->samesite-cookie(mode=Lax, cookie-pattern=JSESSIONID)
path-prefix('/')->samesite-cookie('Strict')
Application JSON Changes
In order for Skyve to enable the Entra ID login option, 3 properties need to be set in the account section of the project JSON file. Update these now if they were not entered previously.
"account": {
  "azureAdAuthTenantId": "<your-tenant-ID>",
  "azureAdAuthClientId": "<your-client-ID",
  "azureAdAuthSecret": "<your-client-secret>"
}
Testing
Once the changes have been applied to the Azure portal and your Skyve application, deploy the changes to confirm they are working.
You will need a user in your Skyve application with a username that matches the email address of an administrator in your active directory that can approve access for your portal app registration.
Approve Access
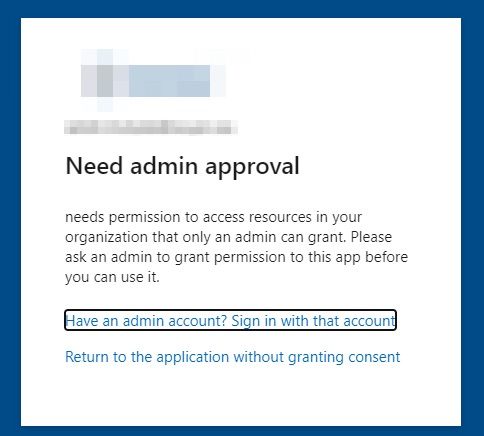
Once you login to your deployed Skyve application for the first time, the login screen should now show an Entra ID sign in option below the username / password input fields. Clicking this will attempt login using Entra ID, and after authenticating, you will be prompted for approval. If you attempt to sign in with an account that does not have the correct permissions, you will be shown a message similar to below:

Once approval has been granted, you should be signed in.