Backup and restore
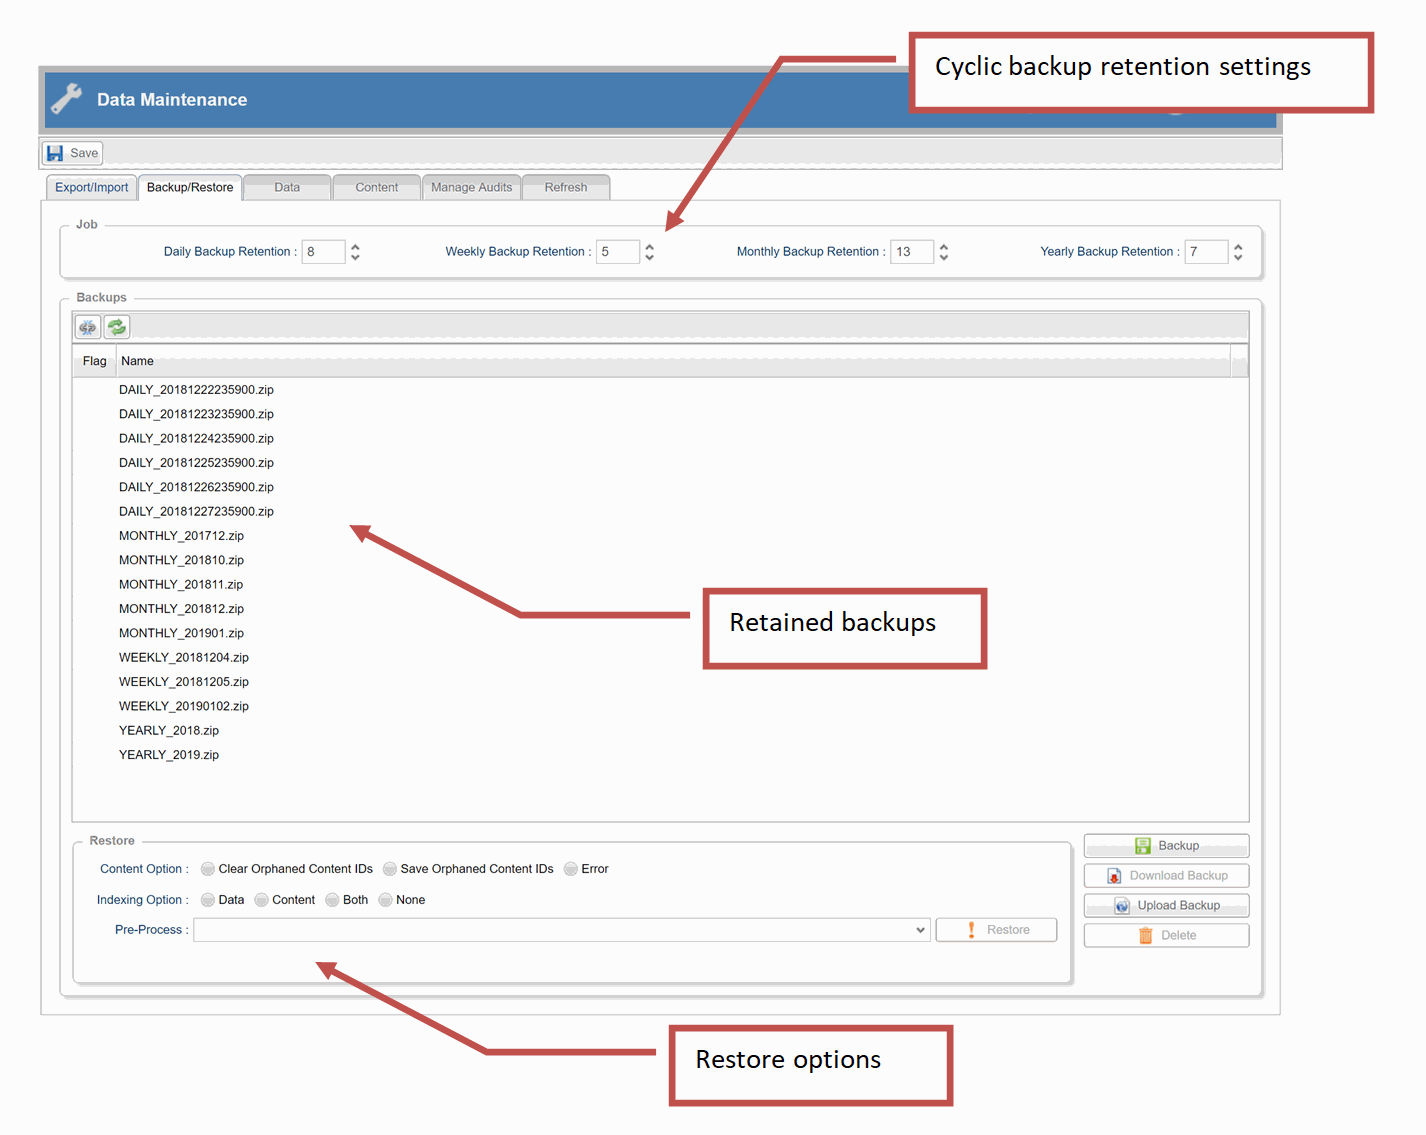
Skyve provides a powerful backup and restore facility that offers a unique range of features.

| Feature | Description |
|---|---|
| platform independent | e.g. backups taken on Windows systems can be restored to Linux systems and vice versa |
| database independent | e.g. backups taken from a system using one database provider (e.g. MS SQL Server) can be restored to systems using another provider (e.g. Oracle, H2 or MySQL) and vice versa |
| includes structured and non-structured data | backups include both SQL/relational/structured database data as well as non-structured/non-sql content items (note that structured and non-structured data are not necessarily guaranteed to be synchronised) |
| handles schema ‘drift’ | Skyve offers a range of restore Pre-Process options to handle cases where a backup was taken from an application with version x domain model or schema and is restored to an application running version y and vice versa |
A detailed set of steps and explanations is included in the Skyve User Guide including for:
- Backup
- Scheduling backups
- Cyclic retention
- Restore
- Recovery options
We strongly recommend developers take the time to read and understand this feature.
NOTE that Skyve backup and restore is an application wide function - across all customer data segments. If your application is a multi-tenant SaaS application, you should consider carefully both backup and restore options.
Customising Skyve backup and restore
The code for Skyve backup and restore is located in the admin module to enable developers to customise where required.
Without going into details, some customisation options to consider are:
- automatically obfuscating data from Production systems (i.e. where the
environmentsetting in the.jsonapplication settings file isnull) as part of the backup process - blocking/disabling downloading backups from a Production system (for example, by setting the
visiblecondition on the Download Backup button to"false" - limiting restore options to those that are appropriate for your method of working
Handling agile development and schema ‘drift’
The Skyve backup and restore capability has been developed with agile development in mind, and restore options provide ways to handle differences between the current schema of the application and the backup being restored.
For an explanation of these options, refer to the Skyve User Guide.
Uploading large backups
Wildfly controls the size limits on file uploads (for example to upload large backup zip files).
To control this you can add max-post-size="4294967296" to the wildfly default http-listener
For example:
<subsystem xmlns="urn:jboss:domain:undertow:8.0" default-server="default-server" default-virtual-host="default-host" default-servlet-container="default" default-security-domain="other" statistics-enabled="${wildfly.undertow.statistics-enabled:${wildfly.statistics-enabled:false}}">
    <buffer-cache name="default"/>
    <server name="default-server">
        <http-listener name="default" socket-binding="http" max-post-size="4294967296" redirect-socket="https" enable-http2="true"/>
        <https-listener name="https" socket-binding="https" security-realm="ApplicationRealm" enable-http2="true"/>
        <host name="default-host" alias="localhost">
            <location name="/" handler="welcome-content"/>
            <http-invoker security-realm="ApplicationRealm"/>
        </host>
    </server>
    <servlet-container name="default">
        <jsp-config/>
        <websockets/>
    </servlet-container>
    <handlers>
        <file name="welcome-content" path="${jboss.home.dir}/welcome-content"/>
    </handlers>
</subsystem>
Configurating the Backup Location
By default, Skyve backups are stored in the content folder in the location specified in the application’s json property file. These are stored in a <customerName>_backup within the content folder, so that each customer has a separate backup with data they have access to.
Cloud Backups
From version 6.0 (8.2.3 for multi-tenant applications), Skyve also supports cloud/offsite backups via Microsoft Azure blob storage. Enabling this requires signing up for a paid Microsoft Azure subscription, and making some minor changes to your application configuration.
Note: these instructions are current as at February 2023 and the steps and/or screenshots may no longer reflect the Azure portal.
Create an Azure storage account
- visit portal.azure.com and sign in or create an account
- if you do not already have an active billing subscription
- start with free trial if you do not already have a subscription
- follow the steps to verify your identity and enter payment details to create a billing account
- once complete, click
Home
- click
Storage AccountsunderAzure Services, or if not listed there, search for it, then select it

- click
Create - select your
Subscriptionfor billing - select a Resource group for the backups, or click
Create newif you do not have one- enter a name, e.g.
SkyveAppBackups, then clickOK
- enter a name, e.g.
- Enter a
Storage account name, e.g.<appname>backup - Select the
Regionfor your backup - Keep performance and redundancy defaults
- click
Next - scroll to the bottom of the
Advancedscreen- under Access tier, change from Hot to
Cool - click
Next
- under Access tier, change from Hot to

- keep defaults on the
Networkingscreen and clickNext(we will change these later) - keep defaults on the
Data protectionscreen and clickNext - keep defaults on the
Encryptionscreen and clickNext - leave tags blank unless you have any you would like to add (used for billing), then click
Review - review all the settings, scroll all the way down, wait for final validation and click
Create - when deployment is complete (this takes a couple of minutes), click
Go to resource - in the menu on the left, scroll to Security + network, then select
Networking- change Public network access to
Enabled from selected virtual networks and IP addresses - Under Firewall, add the IP address of the server(s), e.g. UAT, Prod
- Click
Save - For further info securing the storage account, see the Azure docs
- change Public network access to
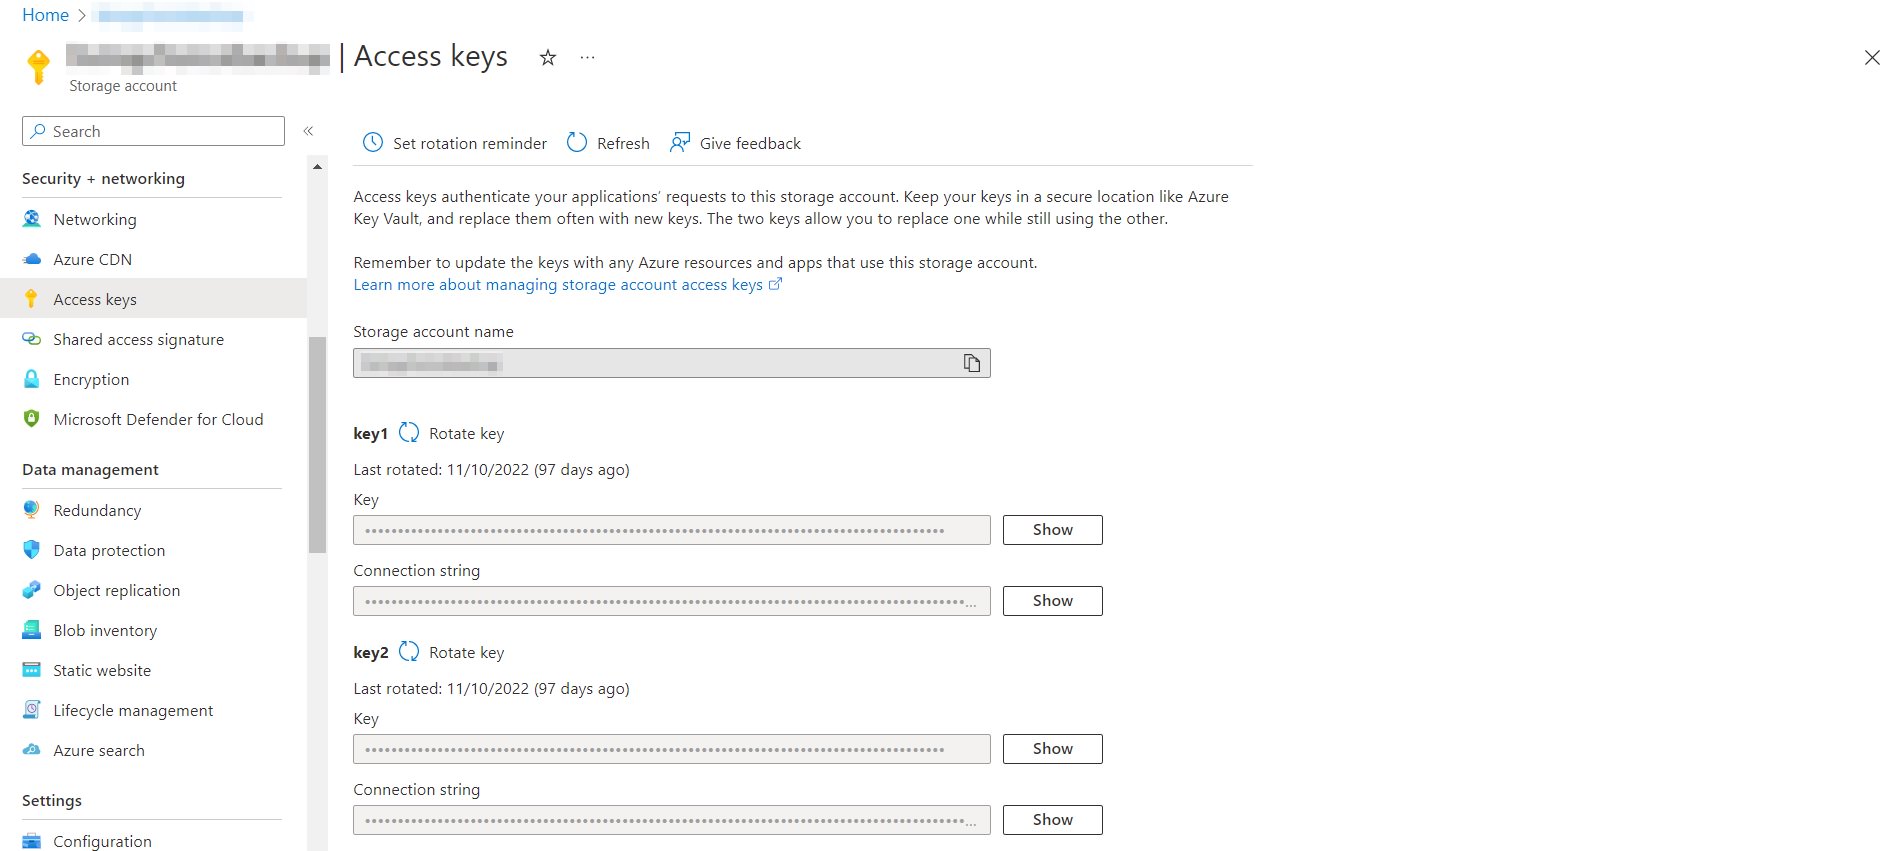
- in the menu on the left, scroll to Security + networking, then select
Access keys- under
key1, click theShowbutton next toConnection string - click the
Copy to clipboardicon at the end of the connection string, we will paste this into our Skyve application in a little bit
- under

Update your Skyve application
- update the appropriate server or docker
.jsonfiles within your project where:ACCOUNT_NAMEis the AccountName in the Storage account name from the Access Keys pageACCOUNT_KEYis a Key from the Access Keys page
"backup": {
    "externalBackupClass": "org.skyve.impl.backup.AzureBlobStorageBackup",
    "connectionString": "DefaultEndpointsProtocol=https;AccountName=ACCOUNT_NAME;AccountKey=ACCOUNT_KEY;EndpointSuffix=core.windows.net",
    // name of the top-level backup directory in Azure, e.g. <applicationName>, this will be created if it does not exist
    "containerName": "<backup directory name>"
},
- add the following dependencies to your application’s
pom.xml:
<dependency>
    <groupId>com.azure</groupId>
    <artifactId>azure-storage-blob</artifactId>
    <version>12.14.0</version>
</dependency>
<dependency>
    <groupId>com.fasterxml.jackson.core</groupId>
    <artifactId>jackson-core</artifactId>
    <version>2.12.5</version>
</dependency>
A single storage account may be used for multiple Skyve applications. By specifying a different containerName in the application’s .json, Skyve backup store the backups in a different directory for each application.
Once this is configured and up and running successfully, you should be able to see backups in your storage account via the Microsoft Azure Storage browser to confirm backups are working. When using an external backup class, Skyve will first perform the backup locally then upload it to Microsoft Azure, so sufficient disk space needs to be available to create an entire backup. When performing a restore, the backup is downloaded from Microsoft Azure, then restored locally.